Techniques to Extend the Use of your Stencils featuring Simon Says Stamp’s Fading Stencils
- Bonnie Crane

- Jul 30, 2021
- 4 min read
Lets face it, most of us have a budget that WE TRY to stick to for our crafting supplies. Stencils are beautiful as well as affordable and can be used in so many different ways. They deserve to be a contender when we make decisions about our purchases. Today’s cards feature five different techniques to extend the use of our stencils. I was thrilled to see Simon Says Stamp’s fading stencil line … FADING FLORALS, FADING CIRCLES AND FADING HEARTS. These stencils are over sized and perfect for any size card including slimlines … now how’s that for versatility!

What’s the same?
I am going to begin, by outlining everything that is the same for each card in this set.
Bristol Smooth card stock has been used for the working panel and is a good choice for the range of applications in these cards; ink blends well on it and it can withstand some moisture.
The panels have all been die cut with the second largest die in Pinkfresh Studio’s Slim Stitched Rectangles. (As I view the photos, it looks like I missed a couple!) The card stock layer was cut with the largest one.
The top panel was mounted on sheet foam.
The stencils were held securely to the panel with Pixie Spray, a repositionable adhesive.
The card bases are constructed from Neenah Classic Crest 110lb card stock and measure 3 3/4” by 8 3/4”.
All the cards except the last one were finished off with gold, silver or clear confetti topped with Nuvo Crystal Drops Morning Dew.
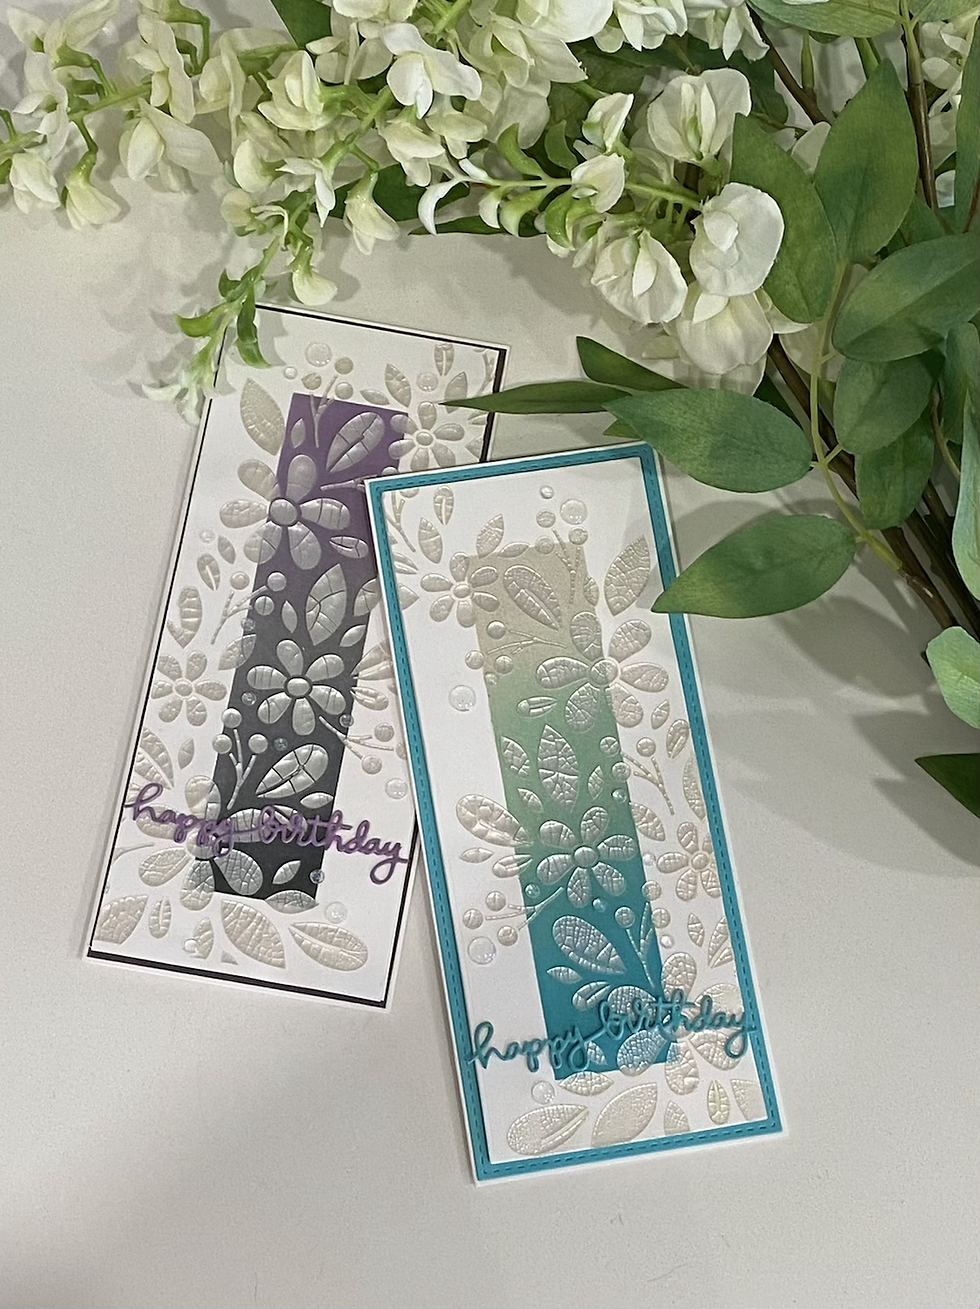
CRACKLE GLAZE AND FADING FLORALS

I began by ink blending the narrow rectangle with a stencil from Simon’s Slimline Masks set using Distress Oxide inks:
Black Soot, Hickory Smoke, Dusty Concord
Peacock Feathers, Bundled Sage, Pumice Stone
Using a media spatula, Nuvo Russian White Crackle Mousse was applied over the fading stencil. This glaze does take a while to dry … enough time to check something off your house work list! Haha!!! The panel will be warped. I tried a couple of methods to flatten them on their foam bases. I used glue for one card and had acceptable but not perfect results. For the second card, I used Sookwang Double Sided tape … the clear winner!!! The panel was completely flattened! I did place the panels using both methods under heavy weight for quite some time. For the sentiment, I stacked three die cuts of Simon’s Handlettered Happy Birthday.
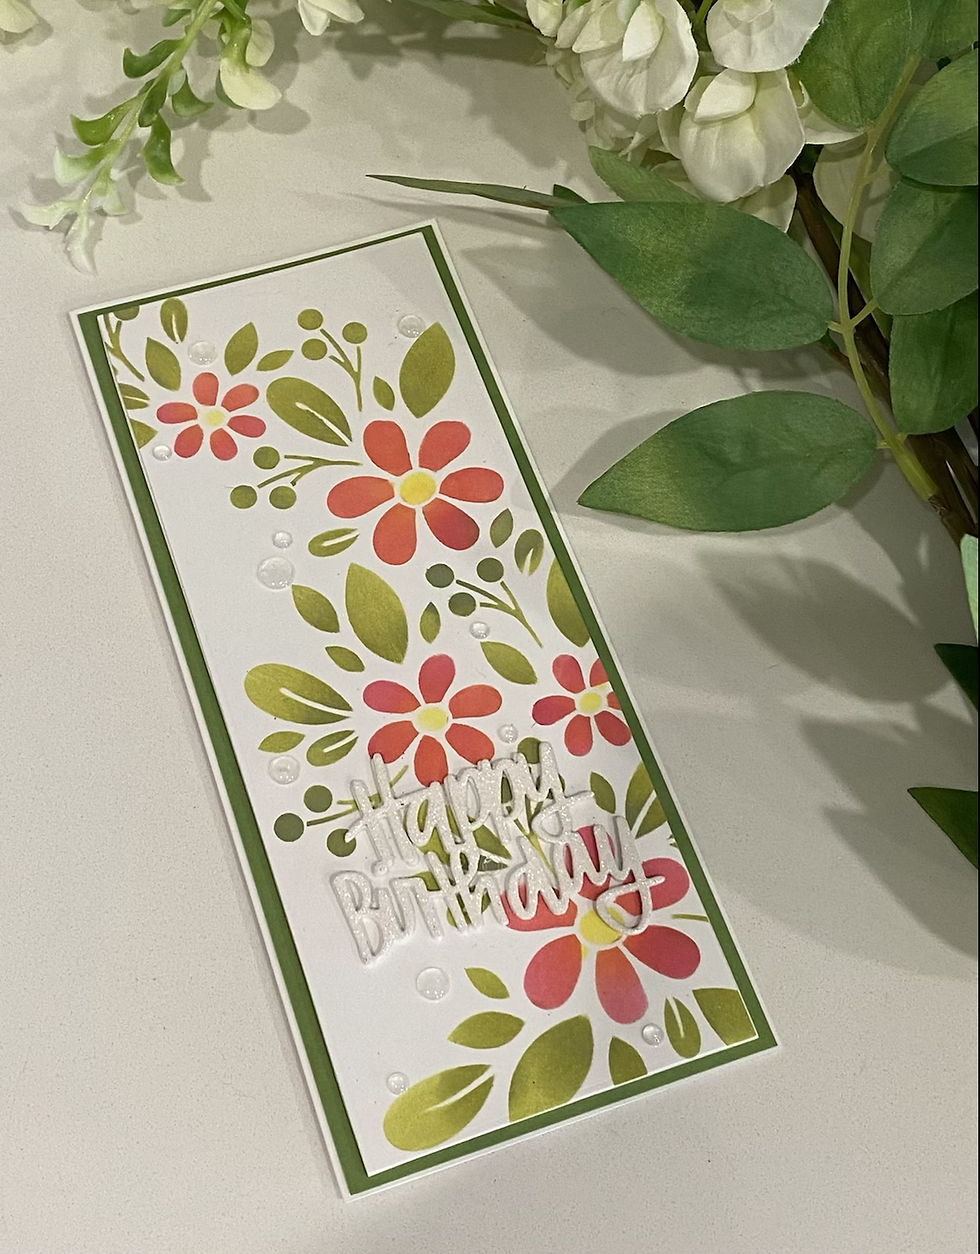
Colouring and Fading Florals

Distress Oxide inks were applied with daubers to colour the floral design:
Flower Centres - Squeezed Lemonade
Flower Petals - Abandoned Coral, Picked Raspberry
Leaves - Peeled Paint, Shabby Shutters
I used Post It Note Tape to mask off areas as the ink was applied. Simon’s Happy Birthday Brush Script was die cut from both white glitter paper and foam and stacked.
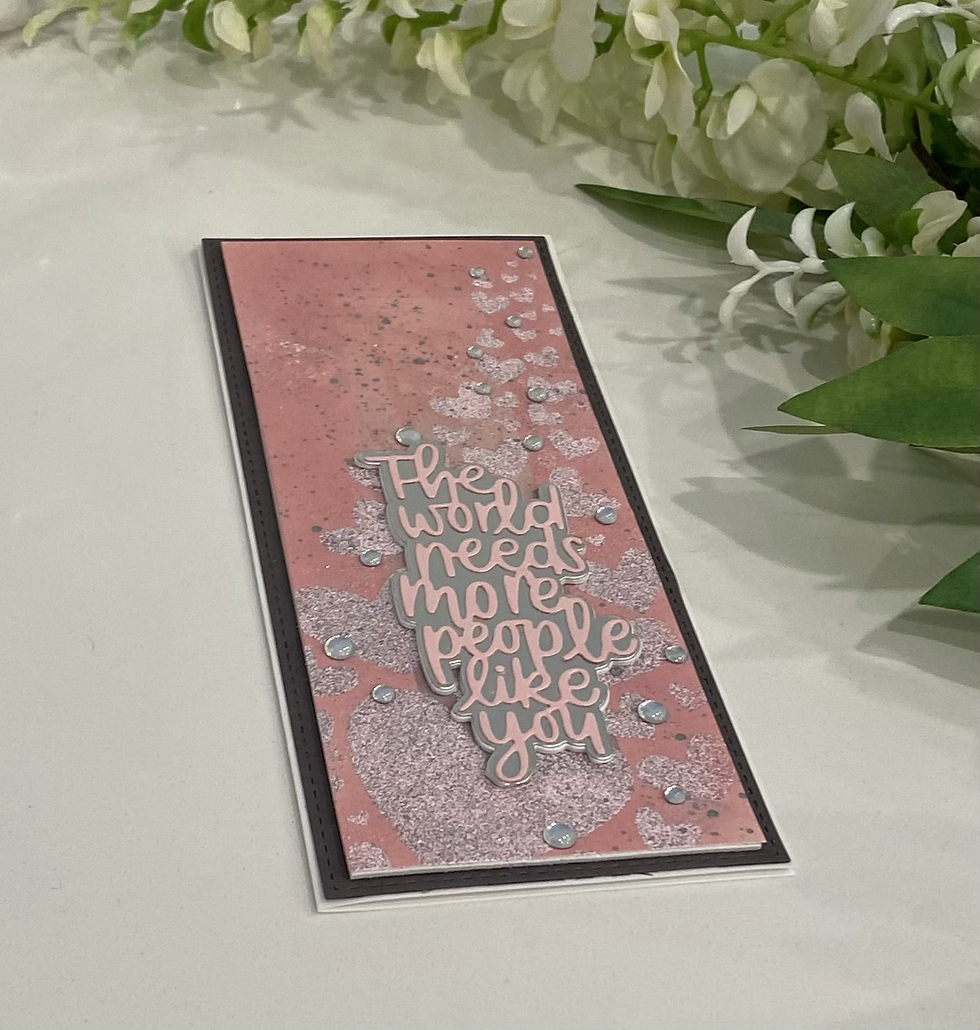
HEAT EMBOSSING AND FADING HEARTS

The panel was inked with Victorian Velvet (Wished I skipped that step!) before using Simon’s Slimline Mask to ink blend a narrow rectangle with Hickory Smoke, Pumice Stone and Spun Sugar. After the panel was completely dry, it was coated with anti static powder. Versamark ink was applied to the heart stencil with a blending tool. I created an embossing powder mix by combining equal parts of metallic silver and pink embossing powders and fine, white glitter. After the panel was embossed, fine spatter was applied with Distress Stain Brushed Pewter. The shadow die from Simon’s The World Needs was used to die cut matte silver foil paper and foam. These were stacked and finished off with the script die cut using Simon’s Cotton Candy card stock.
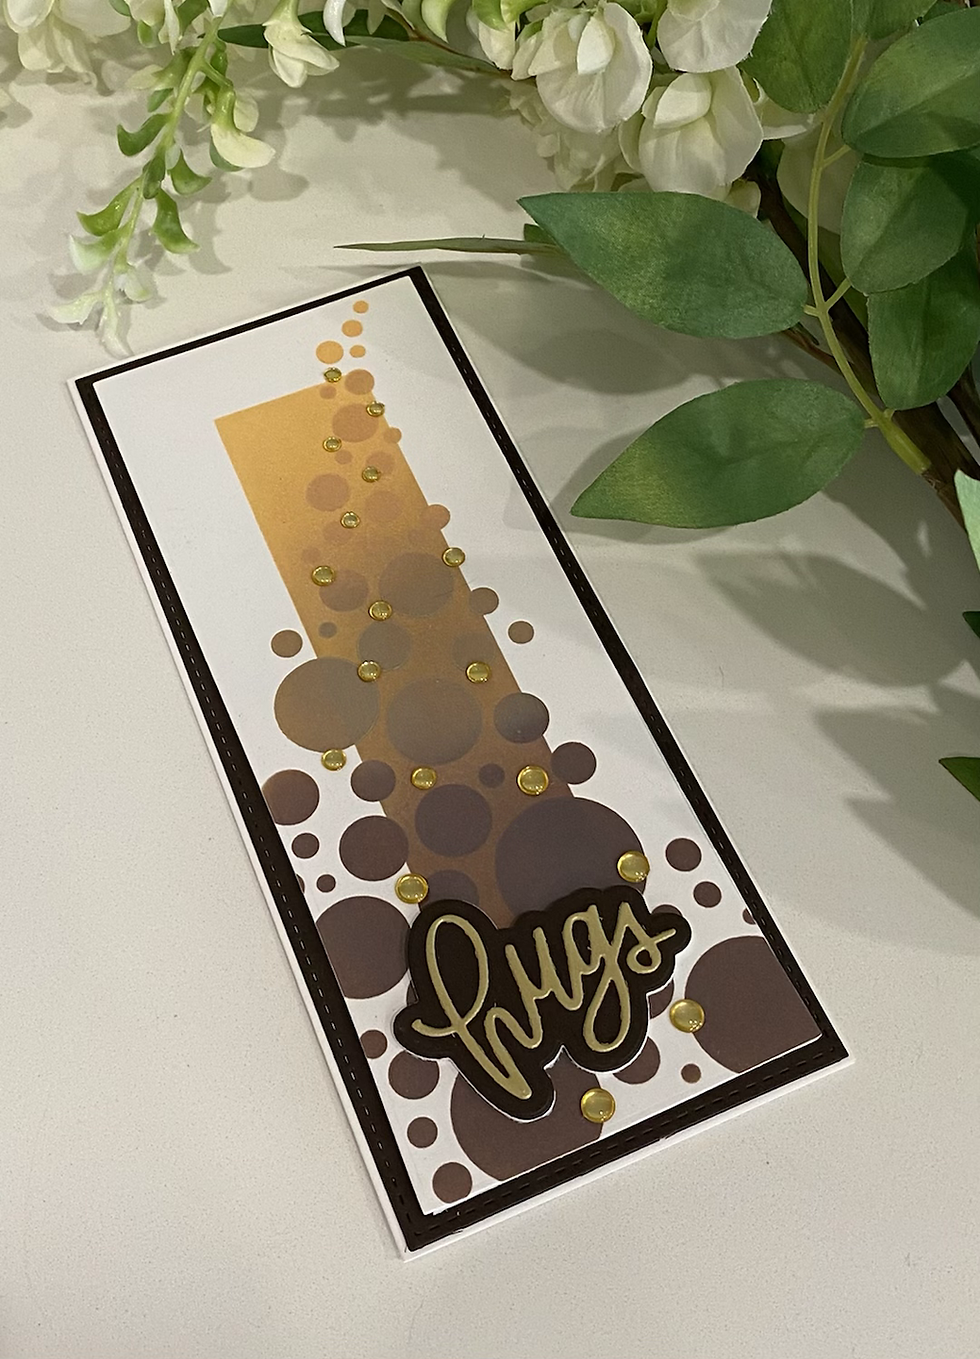
TONE ON TONE AND FADING CIRCLES

This masculine 'thinking of you' card began with Simon’s Slimline masks. The rectangle was ink blended with Distress Oxide inks Walnut Stain, Brushed Corduroy and Dried Marigold. The same colours were used on the circle stencil to create that tone on tone look. The shadow die from Simon’s Big Scripty Hugs die set was used to cut Simon’s Dark chocolate card stock and foam for stacking. The script hugs was die cut from matte gold card stock.
DISTRESS STAINS/GEL AND FADING CIRCLES

This panel with the circle stencil overlaid was sprayed with Distress Spray Stains Mermaid Lagoon and Cracked Pistachio. I made multiple passes with a light spraying to maintain texture. Three pieces of Bristol were also sprayed with various colours and dry brushed with white gouache to create a cross hatched pattern to die cut the animals and sentiment from. When the stain was dry (and this can take awhile), the circle stencil was lined up and positioned over the panel and Gina K’s Iridescent Glitz Glitter Gel was applied. The panel was spattered with Mermaid Lagoon and Cracked Pistachio stains and white gouache. The underwater scene was created with several of Simon’s Picture Book critters; Octopus, Turtle, Seahorse and Fish. So cute!!! The die cut sentiment Summer is from Simon’s Four Season’s Die set. All the die cuts (except a couple of critter body parts ... not sure I like how that sounds!) were mounted on foam. The secondary sentiment was borrowed from an older Simon stamp set, Be A Mermaid. It was stamped with Versafine ink and clear embossed on Simon’s Audrey Blue card stock to match the layering panel. The sentiment was die cut with Simon's Sentiment Labels and stacked on foam. This card was finished off with Simon’s Seaglass Sequin mix and topped with Morning Dew Crystal Drops.
VIDEO TUTORIAL
If you have difficulty viewing this video, click HERE.
SUPPLIES USED
I participate in an Affiliate Link Program. Essentially that means that I receive a small commission for purchases made below. These moneys help support the costs associated with my blog. There is absolutely no difference in the prices of products purchased here or directly from the on-line store. Thank you for your support!


Comments